I’m not the most observant person in the world and have a tendency to easily overlook things. If you’re like me and you’re a WordPress user, you might have never noticed the fact that your WordPress dashboard–the main screen you see when you first login to your WordPress admin area–is totally customizable. Pretty sweet, huh? Here’s how you can customize what shows up there quickly and easily.
How To Customize Your WordPress Dashboard

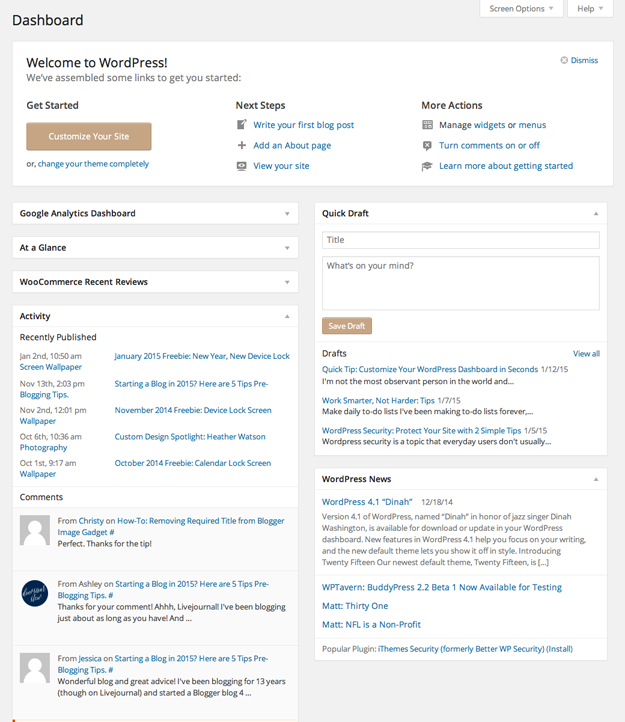
The above is a screenshot of what my WordPress dashboard typically looks like. I’ve got a round-up of my recent activity, a list of recent comments, a quick draft box, WordPress News, and more. But wait a minute…do I really need all this stuff?! The answer is no, I don’t, and WordPress makes it super easy to get rid of.
Control what shows up by clicking “Screen Options”

At the top of the page, there’s an easy to miss button called “Screen Options”. See it? Click it. When you do that, you’ll see a list of “boxes” that you can tick and untick. Ticking a box will make it show up in the area below, while unticking it will make it disappear. I’m deselecting a lot of these, including WordPress News and Quick Draft, because I never use them. (Note that what shows up here varies depending on what plugins you have installed…so if you see some boxes here that you don’t have, don’t worry! “Google Analytics Dashboard,” for example, will only show up if you have that plugin installed).
Rearrange items by dragging and dropping
Now that you’ve cleared out what shows up on your dashboard, you can rearrange the boxes to your liking. To move an item, just hover over it until the crosshair cursor shows up. Then, you can click the box, and with your finger held down on your mouse or keypad, drag and drop it into the new location where you want it to show up. Instant organization!
